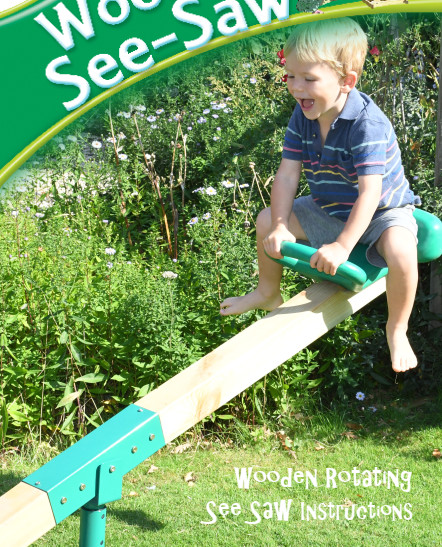
Dear friends, today I'm going to show you a very interactive and interesting product -- wooden seesaw. Next, I will teach you how to assemble with pictures and pictures.
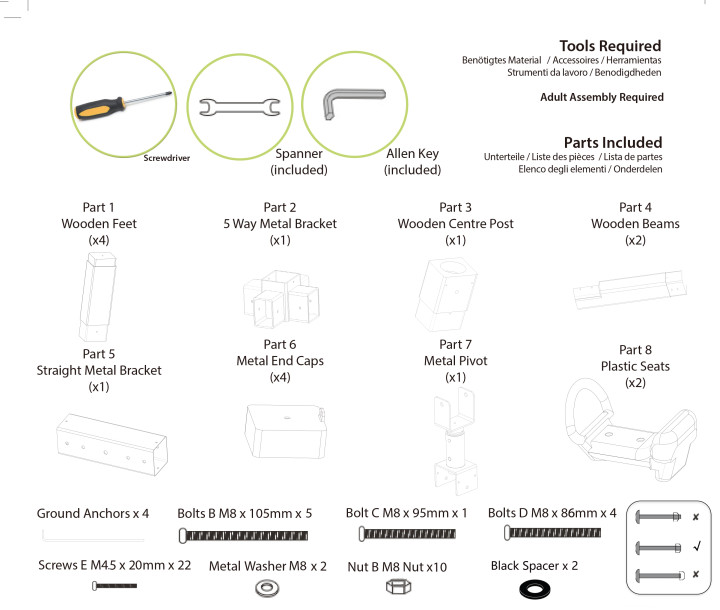
Accessories List
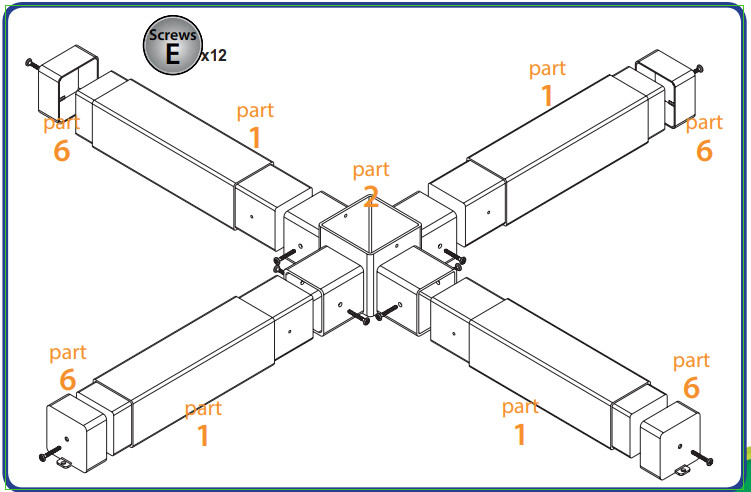
Step 1:
You will need:
4 x Parts 1 (Wooden Feet)
1 x Part 2 (5 Way Metal Bracket)
4 x Parts 6 (Metal Caps)
12 x Screws E (20mm)
Insert one Part 1 (wooden foot) into one of the square horizontal holes in the 5 way metal bracket - Part 2. Securein place using two Screws ‘E’ (see diagram 1). Repeat for the other 3 wooden feet to form a cross base.
Attach the four Parts 6 (metal caps) to the other ends of the wooden feet using four Screws ‘E’. Make sure the holesfor the ground anchors are all on the bottom.
Step 2:
You will need:
Assembled parts from Step 1
1 x Part 3 (wooden centre post)
2 x Screws ‘E’ (20mm)
Insert Part 3 (wooden centre post) into the vertical hole in the 5 way metal bracket - Part 2. Secure in place withtwo Screws ‘E’.
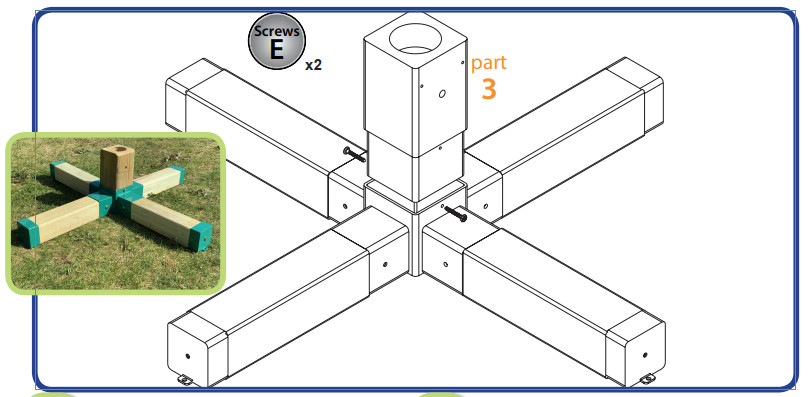
Step 3:
You will need:
Assembled parts from Steps 1 & 2
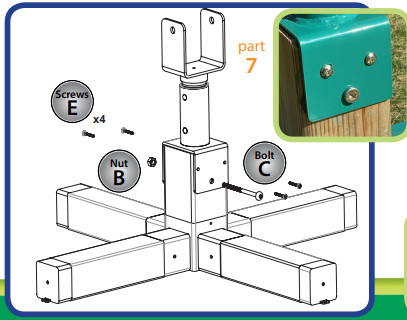
1 x Part 7 (metal pivot)1 x Bolt C (95mm)
1 x Nut B (M8)4 x Screws E (20mm)
Place Part 7 (metal pivot) into the top of the woodencentre post - Part 3. Insert Bolt C through the large holein the metal pivot and wooden centre post and fix withone Nut B using the allen key and spanner provided.Secure the metal pivot in place with four Screws ‘E’.
Step 4:
You will need:
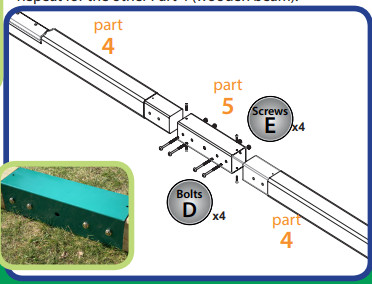
2 x Parts 4 (Wooden Beams)
1 x Part 5 (Straight Metal Bracket)
4 x Bolts D (86mm)
4 x Screws E (20mm)4 x Nuts B (M8)
Insert the square end of one Part 4 (wooden beam)into Part 5 (straight metal bracket) ensuring thecurved end is facing upwards at the other end ofthe beam. Insert two Bolts D through the holes inthe metal bracket and secure with two Nuts B usingthe allen key and spanner to tighten them. Secure inplace with two Screws ‘E’ as shown in diagram.Repeat for the other Part 4 (wooden beam).
Step 5:
You will need:
Assembled parts from Steps 1-3
Assembled parts from Step 4
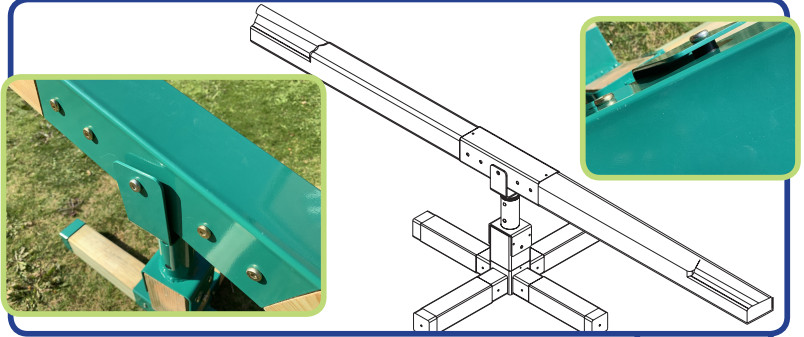
1 x Bolt A (M10 x 95mm)
1 x Nut A (M10)2 x BlackSpacer
Insert Bolt A through the hole in the top of Part 7(metal pivot) , one rubber washer, the assembled wooden beam,the other black spacer and the hole in the other side of Part 7 (metal pivot) . Secure with Nut A and tighten usingthe allen key and spanner.
Tip! - Only fit one black spacer first. As you tighten the Bolt, the black spacer will sink into the hole in Part 5
(straight metal bracket). You can then remove the bolt and fit the second black spacer between the other sideof the beam and the other side of the metal pivot as well.
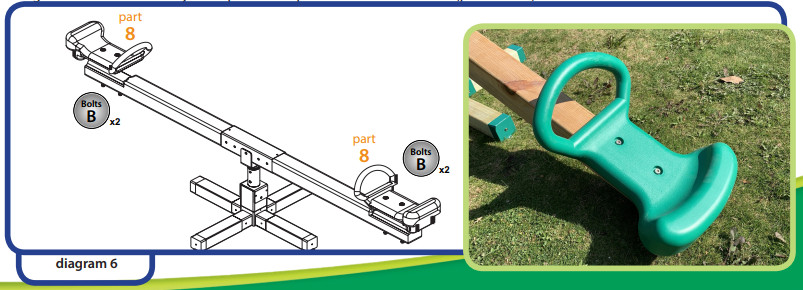
Step 6:
You will need:
Assembled parts from Step 5
2 x Parts 8 (Plastic Seats)4 x Bolts B (105mm)4 x Nuts B (M8)
Place one Part 8 (plastic seat) on top of one moulded end of the wooden beam with the handle closest to thecentre of the beam. Insert two Bolts B into the seat and through the wooden beam. Secure with two Nuts B andtighten with the allen key and spanner. Repeat for the other Part 8 (plastic seat).
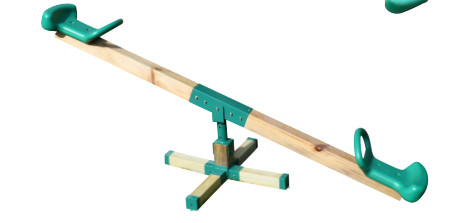
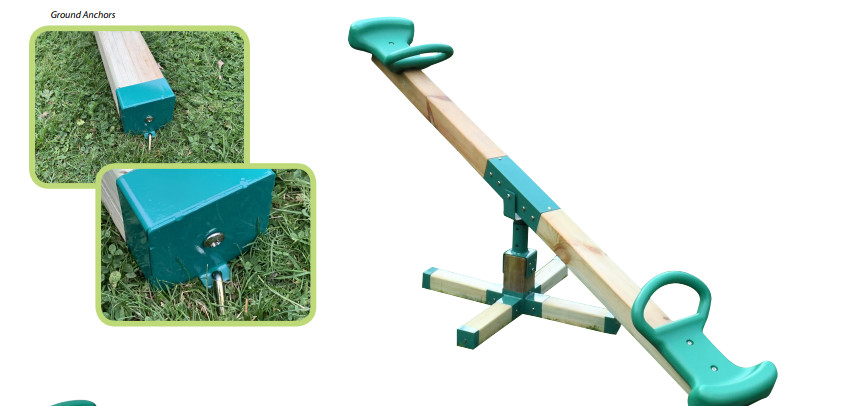
The Finale
Now your see-saw is complete, you simply need to decide where to place it. Please refer to the Before
Installation section for advice. The see-saw should be placed on a suitable ground surface such as grass or aplay mat. Secure the cross base in place with the four ground anchors. We now recommend you tighten all
screws and ensure the nuts are correctly attached to the bolts as shown in the diagram in the parts list.When you have your see-aw in position we would recommend you go round all the screws and bolts again to
make sure they are all tight as they can loosen slightly when you move the see-saw.
Post time: Jun-18-2022